Sunday, September 16, 2012

September Technique: Seamless Tiers

For my Paper Wishes Message Board Technique Challenge this month I chose to share the seamless tiers technique. I saw this recently on Splitcoast Stampers as well as a couple of Stampin' Up! blogs. It's an easy technique that leaves people wondering how you did it and is good for any type of card - birthday, get well, even Christmas!

Cut three panels of white or light-colored cardstock:
5 1/4 x 4
4 1/4 x 3
3 1/4 x 2

And then 2 panels for your mattes and your base card from a colored cardstock that will coordinate with the inks you plan to use on the card:
5 1/2 x 8 1/2 (folded in half for A2 card)
4 1/2 x 3 1/4
3 1/2 x 2 1/4

Next, take your light colored panels and put a very small amount of repositionable adhesive on the back - just enough to hold them in place temporarily. Stack the three on top of each other, centered:

 
Now you will begin stamping. First place your sentiment where you would like it to be. The example I was following used the lower right corner of the top panel.  Then begin stamping other designs around your sentiment.  You can use one color or more than one as I did. I liked the idea of using a more subtle background color with one shape and then a more vibrant color with another shape.
 

Once you have everything stamped, you will separate your layers and matte them with your colored cardstock, placing the largest panel on the base card.

Then we will begin re-stacking the pile!

Put your smallest matted piece on top of the middle-sized matted piece:
 

If you want to place a ribbon around this section now is the time to do it before you add these panels to the base.

And here is the finished card!


Here are two more ideas to get your creative juices flowing.  Notice on the 3rd card, I changed the stacking - instead of centering the panels, I moved them to the upper right corner:


Monday, September 3, 2012

For the Love of Cats

Our first challenge for September on the Mosaic Moments Design Team was to create a layout about a collection. I decided to use my cat figurine collection. I've got a LOT of all different kinds - Necco cats, a Buddha cat, a sunbathing cat, a patriotic cat, a snowflake cat, a cat angel - you name it! Here is my design - you can learn more about my love of cats at http://www.journella.com/storyboard/fullview/id/10017/Pets-Animals-For-the-Love-of-Cats


Sunday, August 26, 2012

Love Penny Black Kitties!

Well, something has happened to my background! I'll have to work on that. I guess it was time for a change anyway!

In any case, I wanted to share a card with you today. For once I was just making a card with no requirements! No specific paper I needed to use, no specific design, no specific color scheme - wow - so many choices!  I have some Penny Black stamps I just got at a sale, so I decided this one would be perfect for a birthday card:

 
Isn't he just the cutest thing? I love the Penny Black cats. They always make me smile.  I colored this one with Prismacolor pencils, blended with a little gamsol. Papers are from Anna Griffin and of course, the Dazzles are from Paper Wishes/Hot Off the Press.


Saturday, August 18, 2012

New Mosaic Moments Post

Challenge time again! This time we were to use husk grid paper, page pattern 14 and either hand journaling, a download, or clear stamps. The layout called for sixteen 2 1/8" photos (or paper pieces) and my 2 1/8" punch sure came in handy!  Sooooo much easier than measuring and cutting each one. I used the Summer Seals stamp set from Mosaic Moments for the corner treatments and the miniature roller coaster at the bottom of the page.  The pictures are from my grandkids' trip to Kings' Dominion in Richmond, Virginia back in 2010.

Sunday, August 5, 2012

Summer Layouts

It seems like life if just now beginning to get back to normal following my mom's death. For a while (and still a little bit) it seemed like the world was whirling past me and I just couldn't keep up!  I'm finally caught up on my Mosaic Moments assignments. I've used summer pictures for the last two so I thought I would post them together.

The first was for the 2nd July assignment - we were to use Navy grid paper, page pattern 60, and either one of the July free downloads, a list or doodles. Let me tell you - I had some challenges on this one! I went to a crop at the end of July and planned to finish the layout and get it posted the next day. Well, I got there and realized that I had left the pictures I planned to use at home!  Arggh!  Well, like all good scrapbookers, we move to Plan B.  I found the pictures of Gavin at the beach that I was going to use for my August layout, but I figured I'd worry about that later! I was going to use taupe paper for that layout, but I needed to use Navy now. Hmm. So - I used taupe for the mattes!  Then to spif it up a bit, I used some orange peel-offs to give it a little bling - it really helped bring out the orange too. Now - for the third element - I decided to use doodling because I was planning to use the July free download in my August layout.  The store had a little fish stamp, so I doodled waves at the top and bottom and used Stardust Stickles to add a little more bling. I also hand-drew the title.  In the end I really liked the outcome, but it took some doing to get there!
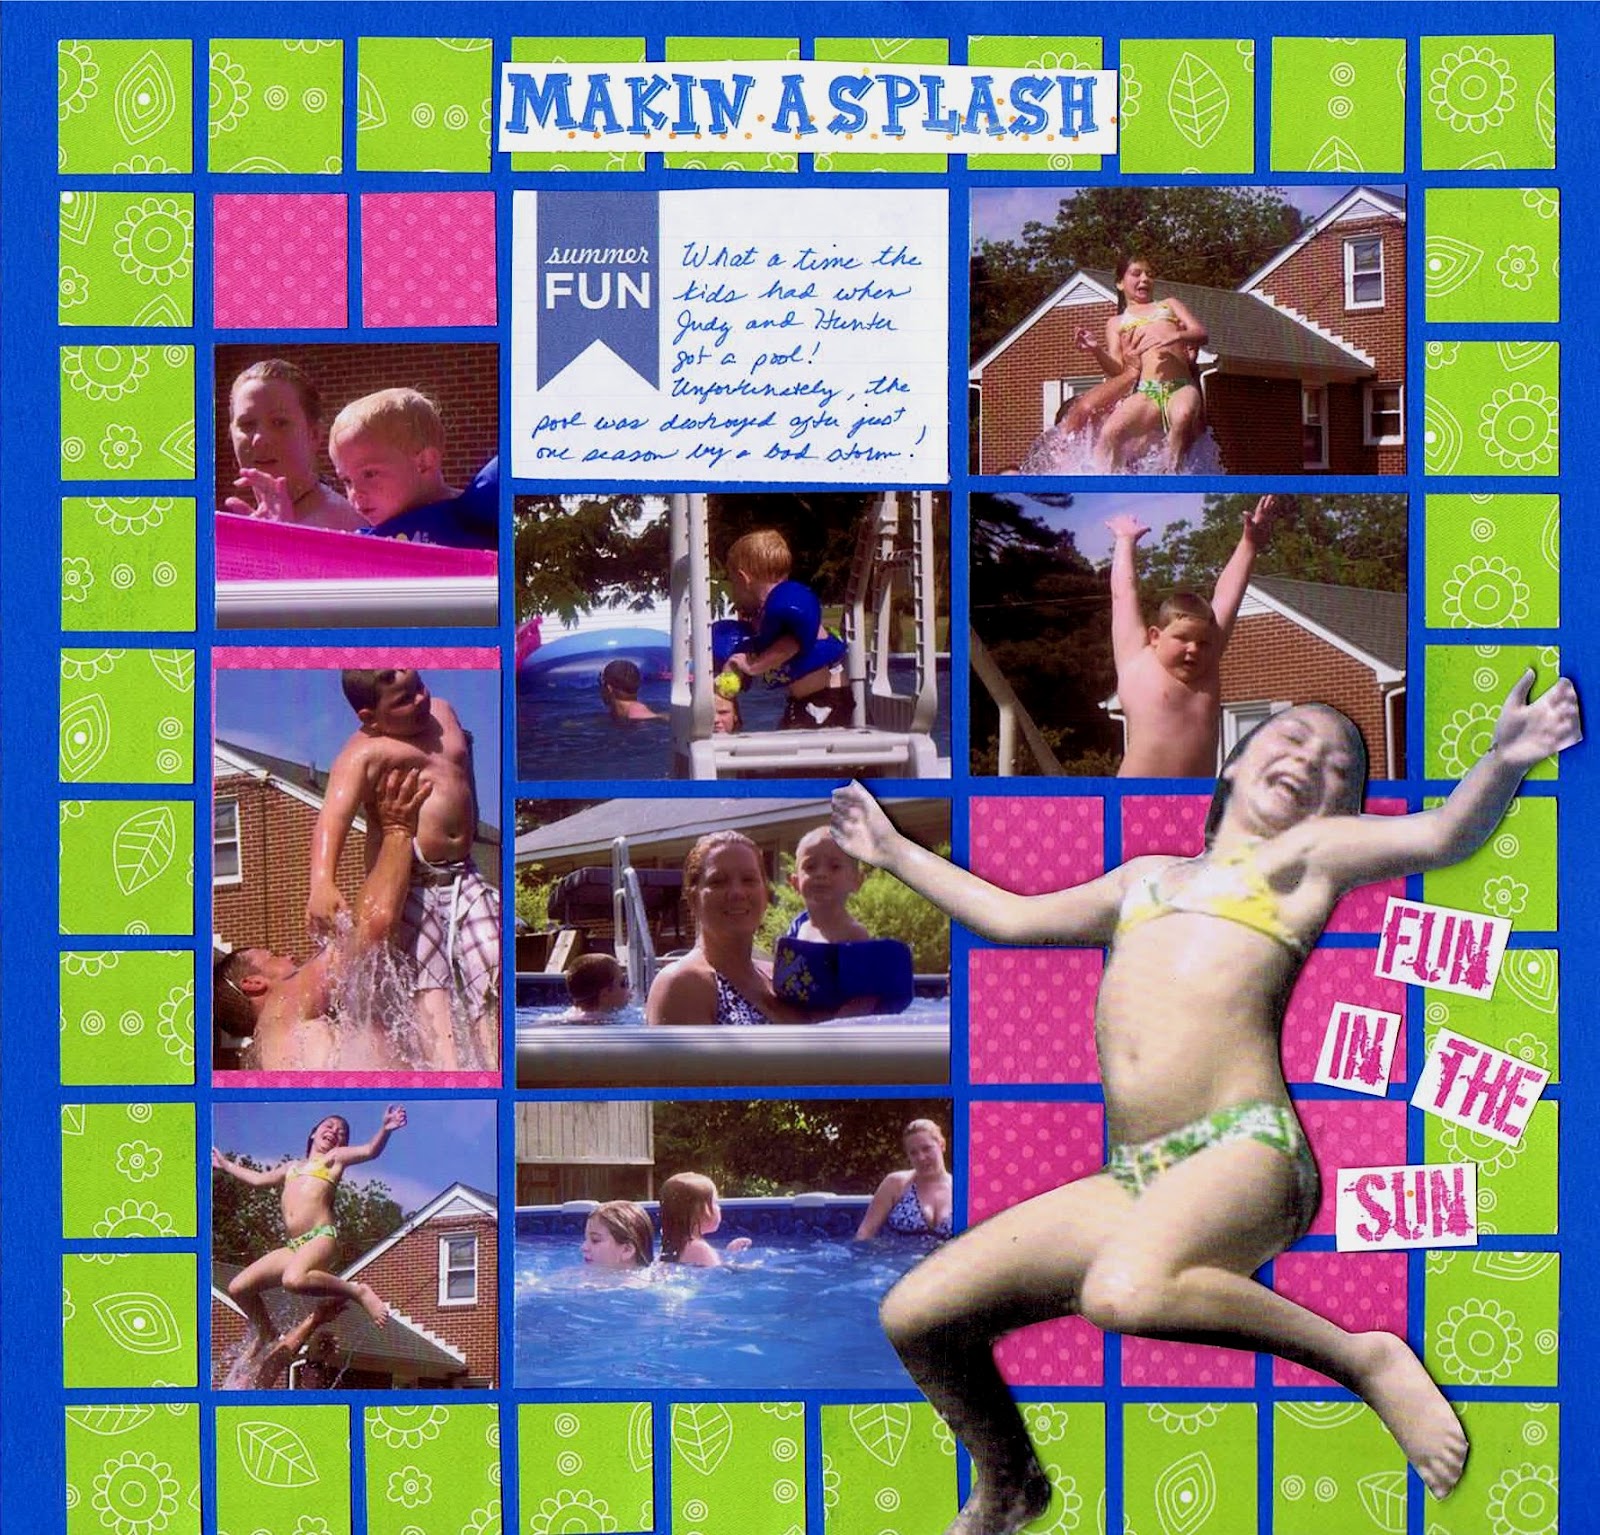
The second layout for August was a photo challenge using pictures that said "Summer" to us. I used pictures from last year when Judy and Hunter got their pool. I decided it would be fun to enlarge one of the pictures and pop it up - I really like the effect!

Sunday, July 8, 2012

America The Beautiful


Our first challenge for July was to use a patriotic song as the inspiration for a page. I started thinking about the pictures I might use and knew pretty quickly that I wanted to use America The Beautiful. We have taken some wonderful pictures on our trips down South.

For the large background pictures, I used a photo of the Great Smoky Mountains in Tennessee. The three smaller pictures are of a waterfall in Georgia on the Turnpike, a picture of Shore Drive in Virginia Beach, Virginia from the beach behind our favorite restaurant, Duck Inn, and a picture of one of the trees in my neighborhood after a snowfall.

For embellishments I decided to adapt a folded star pattern to paper. For the banner below the title, I used 1" squares and folded in two edges. For the actual star embellishments on each side of the title, I used 1" by 1/2" pieces and folded in two edges to make triangles (by cutting off the other half, it cut some of the bulk). I then cut the gold circles using Spellbinders dies on my Cuttlebug.

First, adhere four white triangles to a 3"x3" base.

Next, attach four blue triangles to the white triangles.
Attach four more blue triangles in between the first four blue triangles.

Next, add eight red triangles next to each of the blue triangles
I was going to stop there,  but when I cut the circles out of the gold cardstock with my die cutter, there was too much space left, so I added eight white triangles to the red ones.  I then added the gold circle cut from gold cardstock. Then, using scissors, I cut around the circle.
The finished embellishment!

Sunday, May 13, 2012

Happy Mother's Day!

Happy Mother's Day everyone! This is a card I created for my mom and for a technique challenge at Paper Wishes. The technique itself I saw this month in Creating Keepsakes magazine. You use a doily as a pattern for piercing your paper, and then stitch it!  I will definitely use this technique again!